
After all the samples are roasted and rested as we outlined in our first entry on bringing a new coffee to the shop, they are then brewed, tasted, compared and scored. The best method currently available for this step is a ‘coffee cupping.’
A coffee cupping is a method for experiencing more than one coffee sample under identical brewing times and temperatures simultaneously. Coffee governing and standards setting bodies have articulated very detailed steps for carrying out a coffee cupping. For example, see the SCAA's guidelines on cupping standards.
These standards are set forth so that if I speak to someone half a world away about the characteristics of a sample we are speaking the sample language and are rewarding or penalizing a coffee using the same standards.
Our typical cupping methodology is as follows:
1. Weigh out 11 grams of each coffee to be sampled (the samples are roasted in a style and to a level that is Sump-like and not per the SCAA rules because we are evaluating them for use and sale in our shop and not as an objective measure of the coffee).
2. Add to this, but kept separate, an additional 4 or 5 beans of the sample, these will be used for purging/cleaning the grinder between samples.
3. Place each 11 gram sample in an 8 oz. Gibraltar cup (having fixed volume vessels ensures an equal and fixed amount of water is added to the sample – the size of the vessel determines and fixes the coffee to water ratio).
4. Grind each sample coarsely – either on a French Press or percolator setting on a grinder, stopping to purge the grinder between each sample with the 4 or 5 beans set aside from step 2 and return each ground sample to its 8 oz. cup.
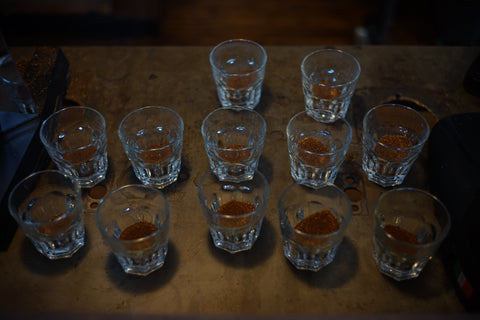
5. Space the sample cups in a line with enough space to allow people to stand shoulder to shoulder with a sample cup in front of them both.
6. Evaluate the dry aroma (breath deep with your nose very close to/in the cup) of each sample and record.
7. With 200F to 205F water at hand, simultaneously start a timer for 4 minutes and wet the ground coffee, filling each cup to the rim, moving from left to right along the line of sample cup.

8. At 4 minutes the wet aroma is evaluated and recorded by using the back of a soup-like spoon to fold back (also known as breaking the crust) the coffee that remains floating on top of the coffee while simultaneously breathing deeply the wet aroma with your nose mere millimeters above the surface of the sample. (This folding step is done with 3 or 4 folds of the spoon along the surface and is not a deep Ovaltine-like stir).
9. Once all the samples’ crusts have been broken, anything remaining floating, coffee bits or the crema, is skimmed and removed.
10. Tasting and recording the results starts once the coffee is cool enough – around the 6 minute mark, and is done by taking a clean spoon (cleaned by dipping in hot rinse water), filling it about half way with the liquid sample, standing upright, and slurping (the louder the better) the sample from the spoon into your mouth. Rinse the spoon. Move to the next sample. Repeat. You move down the line of samples until you get to the end then repeat the process least 2 more times so you can evaluate the samples at different temperatures.
After all the samples have been compared and all the experiential data recorded buying decisions can begin. Many factors go into deciding which coffees to bring into the shop: the highest scoring coffee from the set, current coffees available in the shop, pending green coffee contracts for coffees we’re obligated to buy but have not arrived yet, the coffee’s intended use or consumer (inside the shop or outside the shop), per pound pricing (Is it $4/lbs or $15+/lbs?), the number of bags the seller has on hand (Is it one bag? Is it a microlot?), can we buy the whole lot or will we have to share it with another roaster?
In addition to weighing the above pencil and paper considerations, we also take the additional steps of both brewing the lead candidates as V60s and, when possible, pulling them as EK 43 espresso shots.
After all the above considerations, it is as simple as a few phone calls and spending a lot of money, thereafter a pallet of green coffee (between 1,500 and 1,800 lbs) shows up at our door within 2 to 5 days.
Once we receive the bags of green coffee the process begins all over again, but instead of different coffee samples we create different roasting curves for each coffee and cup, brew and review each, selecting the curve that best represents the coffee in our style of roasting.